Kenmore Model 158 sewing machines, popular Sears models, boast readily available instruction manuals in PDF format online; These 34-page guides detail operation and maintenance.
Numerous resources, including Sears Parts Direct, offer free downloads for various Kenmore 158 series, aiding users with their vintage machines.
Finding the correct manual ensures proper use, troubleshooting, and care for this classic sewing machine, enhancing its longevity and performance.
Overview of the Model 158
The Kenmore 158 sewing machine represents a robust and reliable vintage option, widely distributed by Sears. Often found with a cabinet and foot pedal, this model gained popularity for its durability and straightforward functionality. Numerous variations exist within the 158 series – 158.19142, 158.1355080, 158.1400, and others – each potentially requiring a specific instruction manual for optimal use.
These machines typically feature basic stitch options like straight and zigzag, catering to a range of sewing projects. The availability of downloadable PDF manuals, often 34 pages in length, is a significant benefit for owners. These guides cover everything from initial setup to basic operation and maintenance. Understanding the specific sub-model is crucial when locating the correct manual, as bobbin mechanisms and features can differ between variations.
The Kenmore 158 is a testament to quality construction, and a well-maintained machine, guided by its instruction manual, can provide years of service.
Dating Your Kenmore 158
Determining the age of your Kenmore 158 can be surprisingly important, especially when sourcing the correct instruction manual. While a definitive date isn’t always readily apparent, the model number itself provides clues. Variations like 158.19142 or 158.1355080 indicate specific production runs.
The instruction manual, when found, sometimes includes printing dates or references to Sears catalog years, offering a direct indication of its age. Online resources and sewing machine forums can assist in deciphering these numbers. Often, the serial number, if present on the machine, can be cross-referenced with Sears’ records (though this can be challenging).
Knowing the approximate age helps ensure you’re using the most accurate manual, as features and instructions may have evolved slightly over the years. Accessing the correct PDF manual is easier with a precise model number.
Setting Up Your Machine
Kenmore 158 setup, detailed in the instruction manual, involves installing the bobbin, threading the upper thread, and winding a new bobbin correctly.
The PDF manual guides users through these initial steps for optimal sewing performance.
Installing the Bobbin
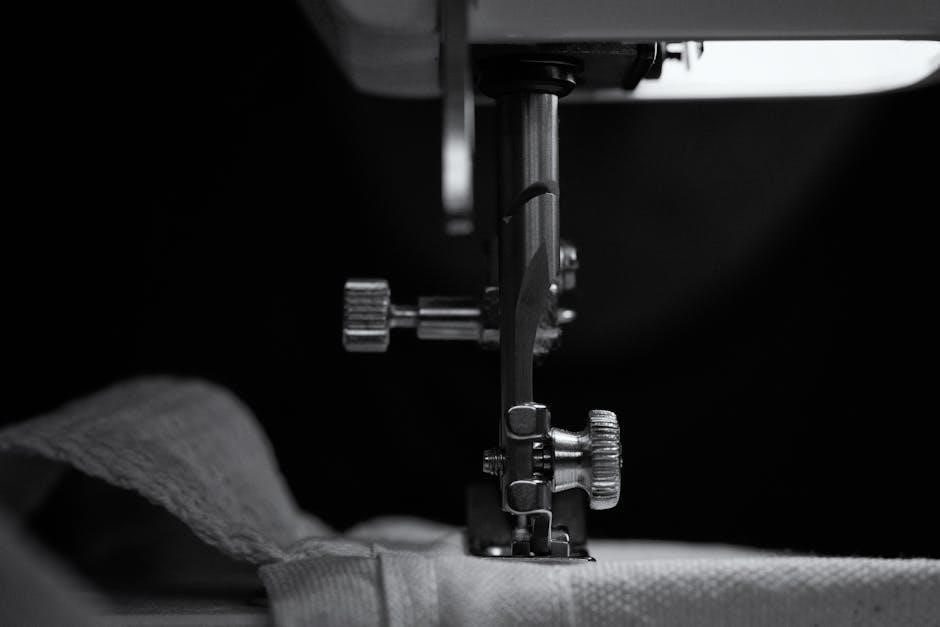
The Kenmore 158 instruction manual provides clear guidance on bobbin installation, which varies slightly depending on the specific sub-model (e.g., 158.19400). Generally, access the bobbin case through an opening on the front of the machine.
Important Note: Some 158 series models, like the 158.17851, do not utilize a traditional bobbin case. The manual will illustrate the correct orientation for inserting the bobbin – ensuring the thread unwinds in the proper direction.
Securely place the bobbin into the bobbin area, guiding the thread through the tension slot or designated path as shown in the diagrams. Proper bobbin installation is crucial for achieving balanced stitches and preventing thread nests.
Always refer to your specific model’s manual for precise instructions, as variations exist within the 158 series.
Threading the Upper Thread
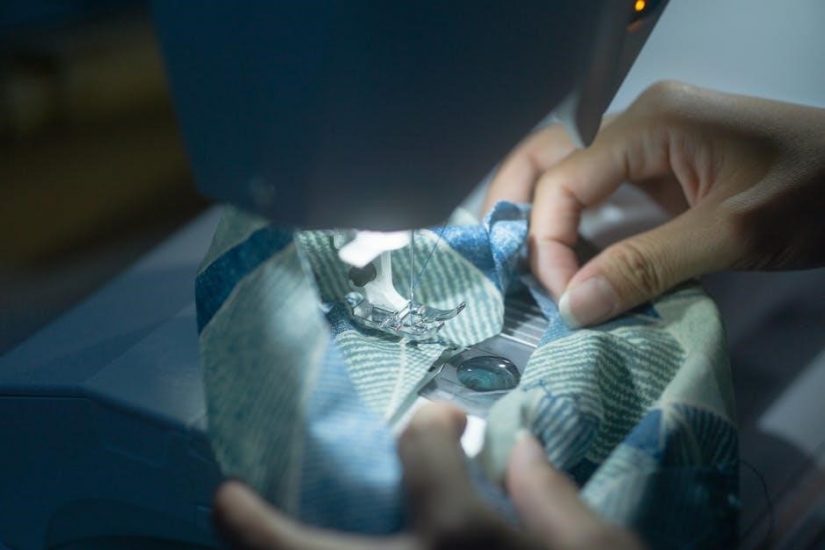
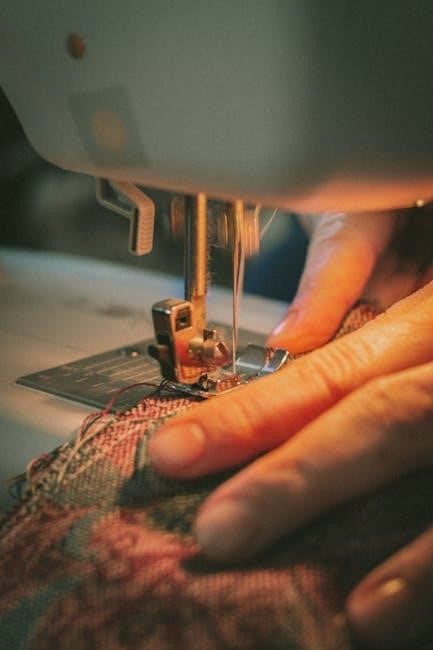
The Kenmore 158 sewing machine’s manual details a specific threading path vital for correct operation. Begin by raising the presser foot; this opens the tension discs. Place the spool of thread on the spool pin and secure it.
Guide the thread through the first thread guide, then down and around the tension discs, ensuring it seats firmly between them. Continue following the manual’s diagram, leading the thread through the take-up lever and then down to the needle bar.
Finally, thread the needle from front to back. Proper threading ensures consistent tension and prevents skipped stitches. Refer to the instruction manual for detailed illustrations and troubleshooting tips if encountering difficulties.
Always double-check the threading path before starting to sew.
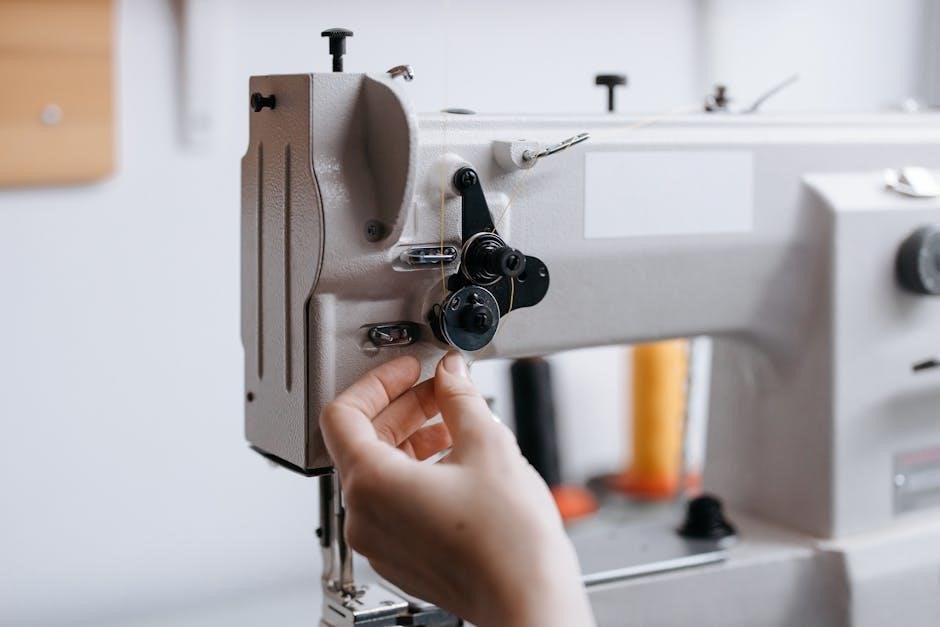
Winding the Bobbin
The Kenmore 158 instruction manual outlines a straightforward bobbin winding process. Place the spool of thread on the spool pin and guide it through the thread guides designated for bobbin winding. Ensure the thread is securely positioned.
Next, thread the end of the thread through the tension disc and then several times around the bobbin itself. This ensures even distribution of thread onto the bobbin.
Place the bobbin onto the bobbin winder spindle and push it to the right to engage. Start the machine slowly, allowing the bobbin to fill evenly.
Once full, the winder will automatically stop. Cut the thread and remove the bobbin. Refer to the manual for visual aids and troubleshooting if needed.
Basic Sewing Operations
Kenmore 158 manuals detail essential operations like straight and zigzag stitching. Adjust stitch length and width using designated dials for varied sewing needs.
Proper threading and bobbin installation, as shown in the manual, are crucial for consistent stitch formation and optimal machine performance.
Straight Stitching
Kenmore 158 instruction manuals emphasize straight stitching as a foundational technique. Begin by ensuring correct threading of both the upper thread and the bobbin, as detailed in the manual’s diagrams. Select the straight stitch setting on the machine – typically indicated by a straight line symbol.
Adjust the stitch length using the corresponding dial; shorter stitches are ideal for delicate fabrics, while longer stitches suit heavier materials. Practice on scrap fabric first to achieve consistent results. The manual advises maintaining a consistent feed rate and guiding the fabric gently, avoiding pulling or pushing.
Proper tension is vital for a balanced stitch. Refer to the manual’s troubleshooting section if loops or puckering occur, as this indicates tension adjustments are needed. Mastering straight stitching is key to many sewing projects with your Kenmore 158.
Zigzag Stitching
The Kenmore 158 sewing machine’s instruction manual details zigzag stitching as a versatile technique for finishing raw edges and creating decorative effects. Select the zigzag stitch setting, identified by the zigzag symbol on the stitch selection dial. Adjust both the stitch length and width using the corresponding dials.
A narrower width creates a denser stitch, ideal for reinforcing seams, while a wider width produces a more pronounced zigzag for decorative purposes. The manual recommends testing stitch settings on scrap fabric before applying to your project.
Proper tension is crucial for a balanced zigzag stitch. Consult the manual’s troubleshooting guide if uneven stitches or puckering occur; Zigzag stitching, when mastered, expands the creative possibilities of your Kenmore 158 machine.
Adjusting Stitch Length and Width
The Kenmore 158 sewing machine manual explains that stitch length and width are controlled by dedicated dials on the machine. Stitch length, measured in millimeters, determines the distance between each stitch. Shorter lengths are suitable for delicate fabrics and curves, while longer lengths are best for basting or heavier materials.
Stitch width, applicable to zigzag and decorative stitches, controls the breadth of the stitch. Wider widths create bolder patterns, while narrower widths offer more subtle effects. The manual emphasizes testing adjustments on scrap fabric.
Incorrect settings can lead to puckering or loose seams. Refer to the manual’s diagrams for precise dial locations and recommended settings for various fabrics and stitch types, ensuring optimal sewing results with your Kenmore 158.
Advanced Features & Techniques
Kenmore 158 manuals detail attachment usage, pattern marking understanding, and common issue troubleshooting for skilled sewers seeking to maximize machine capabilities.
Using Attachments and Presser Feet
Kenmore 158 instruction manuals emphasize the importance of correct attachment and presser foot selection for diverse sewing tasks. The manuals illustrate how different feet – like the zigzag foot, buttonhole foot, or zipper foot – impact stitch quality and fabric handling.
Detailed diagrams showcase proper attachment procedures, ensuring secure fitting and preventing damage to the machine. Users learn to adjust presser foot pressure for varying fabric weights, achieving optimal stitch formation. The guides also explain specialized attachments, expanding the machine’s functionality beyond basic sewing.
Understanding these features, as outlined in the manual, unlocks the Kenmore 158’s full potential, enabling complex projects and professional-looking results. Proper usage extends the life of both the machine and its accessories.

Understanding Pattern Markings
Kenmore 158 sewing machine manuals don’t directly detail pattern markings, but successful sewing relies on interpreting them accurately. Users are expected to have basic pattern reading knowledge. However, the manual’s emphasis on stitch selection and adjustment supports precise pattern execution.
Understanding grainlines, notches, and cutting lines is crucial. The machine’s adjustable stitch length and width allow for replicating pattern-specified stitch types. Accurate seam allowances, indicated on patterns, are achieved through consistent guiding and proper presser foot usage, as detailed in the manual.
While not explicitly covered, the Kenmore 158’s versatility, combined with pattern reading skills, enables users to translate designs into finished garments and projects effectively.
Troubleshooting Common Issues
The Kenmore 158 sewing machine manual, while vintage, provides foundational troubleshooting guidance. Common issues like thread breakage or uneven stitching often stem from improper threading, detailed in the manual. Bobbin winding problems are addressed, emphasizing correct bobbin insertion and tension.
If the machine fails to operate, the manual suggests checking the power cord and belt. Sticking or skipping stitches may indicate a need for cleaning and oiling, procedures outlined within. Online forums supplement this, offering solutions for more complex problems.
Sears Parts Direct provides access to service manuals for specific 158 series, offering deeper diagnostic information for experienced users.
Maintenance and Care
Kenmore 158 manuals emphasize regular cleaning and oiling for optimal performance. These procedures, detailed within, ensure longevity and smooth operation of the machine.
Cleaning Your Kenmore 158
Regular cleaning, as outlined in the Kenmore 158 instruction manual, is crucial for maintaining peak performance. Begin by disconnecting the power source. Use a soft brush to remove lint and dust from the bobbin area, feed dogs, and surrounding components.
The manual advises wiping down the exterior with a slightly damp cloth; avoid harsh chemicals. Pay close attention to areas where oil accumulates. A small vacuum attachment can effectively remove debris from hard-to-reach places.
Important: Never lubricate before cleaning, as this attracts more lint. Thorough cleaning prevents jams, ensures accurate stitching, and extends the life of your Kenmore 158. Consult the PDF manual for detailed diagrams and specific cleaning recommendations for your model variation.
Oiling and Lubrication
The Kenmore 158 instruction manual emphasizes the importance of proper lubrication for smooth operation. Use only sewing machine oil – never household oil – to prevent gumming. Oil all designated points after cleaning, as detailed in the manual’s diagrams.
Key areas include the bobbin race, shuttle hook, and any moving parts identified in the PDF. Apply oil sparingly; a drop or two is sufficient. Wipe away any excess oil to avoid attracting lint.
Caution: Over-oiling can be as detrimental as under-oiling. Refer to your specific Kenmore 158 model’s manual for precise lubrication instructions. Regular oiling, following the manual’s guidance, ensures longevity and prevents wear and tear.
Belt Replacement
The Kenmore 158 instruction manual details the process for replacing the drive belt, a common maintenance task. Begin by disconnecting the power supply. Access the belt, typically located beneath the machine’s housing, often requiring removal of panels as shown in the manual’s diagrams.
Carefully remove the old belt, noting its routing around the motor pulley and handwheel. Install the new belt, ensuring it’s properly seated in the grooves. The PDF manual provides visual guidance for correct placement.
Reassemble the machine, verifying the belt tension is appropriate – not too tight, not too loose. Consult the manual for specific tensioning instructions. A correctly installed belt ensures smooth, reliable operation.
Resources and Manuals
Kenmore 158 manuals are available as free PDF downloads from Sears Parts Direct and online forums, aiding users with machine operation and repair.
Locating the Official Instruction Manual (PDF)
Finding the correct instruction manual for your Kenmore 158 sewing machine is crucial for optimal use and maintenance. Several online resources offer free PDF versions of these manuals. Sears Parts Direct is a primary source, providing downloadable manuals for various Kenmore 158 series models, including those with differing bobbin systems like the 158.19400.
These PDF documents, often around 34 pages in length, detail everything from initial setup and threading to advanced techniques and troubleshooting. Websites and online sewing communities also host these manuals, offering a convenient way to access them. Remember to search specifically for your model number (e.g., 158.19142) to ensure you download the correct guide. Adobe Acrobat Reader is required to view these PDF files.
Online Support Forums and Communities
Kenmore 158 sewing machine owners benefit greatly from vibrant online communities and support forums. These platforms offer a wealth of knowledge, shared experiences, and assistance with troubleshooting. Users frequently share links to instruction manuals, including PDF versions, and provide guidance on locating specific resources.
These forums are invaluable for addressing unique issues not covered in the official manual or for deciphering unclear instructions. Experienced users often assist newcomers with questions regarding threading, stitch selection, and maintenance. Communities like OurWorkBench have been instrumental in directing users to available manuals. Engaging with these groups provides a collaborative learning environment and ensures your Kenmore 158 remains in excellent working condition.
Sears Parts Direct for Manuals and Parts
Sears Parts Direct is a crucial resource for Kenmore 158 sewing machine owners seeking instruction manuals and replacement parts. They offer free PDF downloads of manuals for numerous vintage Kenmore models, including various iterations of the 158 series (e.g., 158.19400, 158.17851).
Beyond manuals, Sears Parts Direct provides access to a comprehensive inventory of parts, essential for maintaining and repairing your machine. This includes belts, needles, and other components prone to wear and tear. Navigating their website allows users to locate specific parts diagrams and ensure compatibility. It’s a convenient hub for both restoring functionality and extending the lifespan of your classic Kenmore 158 sewing machine.